
ADA Compliance Checklist: 7 Smart Ways You’ll Wish You Knew Sooner
ADA Compliance Checklist: 7 Smart Ways You’ll Wish You Knew Sooner
Why an ADA Compliance Checklist Is the Smartest Move You Can Make Right Now
An ADA compliance checklist is the fastest way to identify accessibility gaps before they become lawsuits. Here is a quick overview of what it covers:
Quick ADA Compliance Checklist Overview
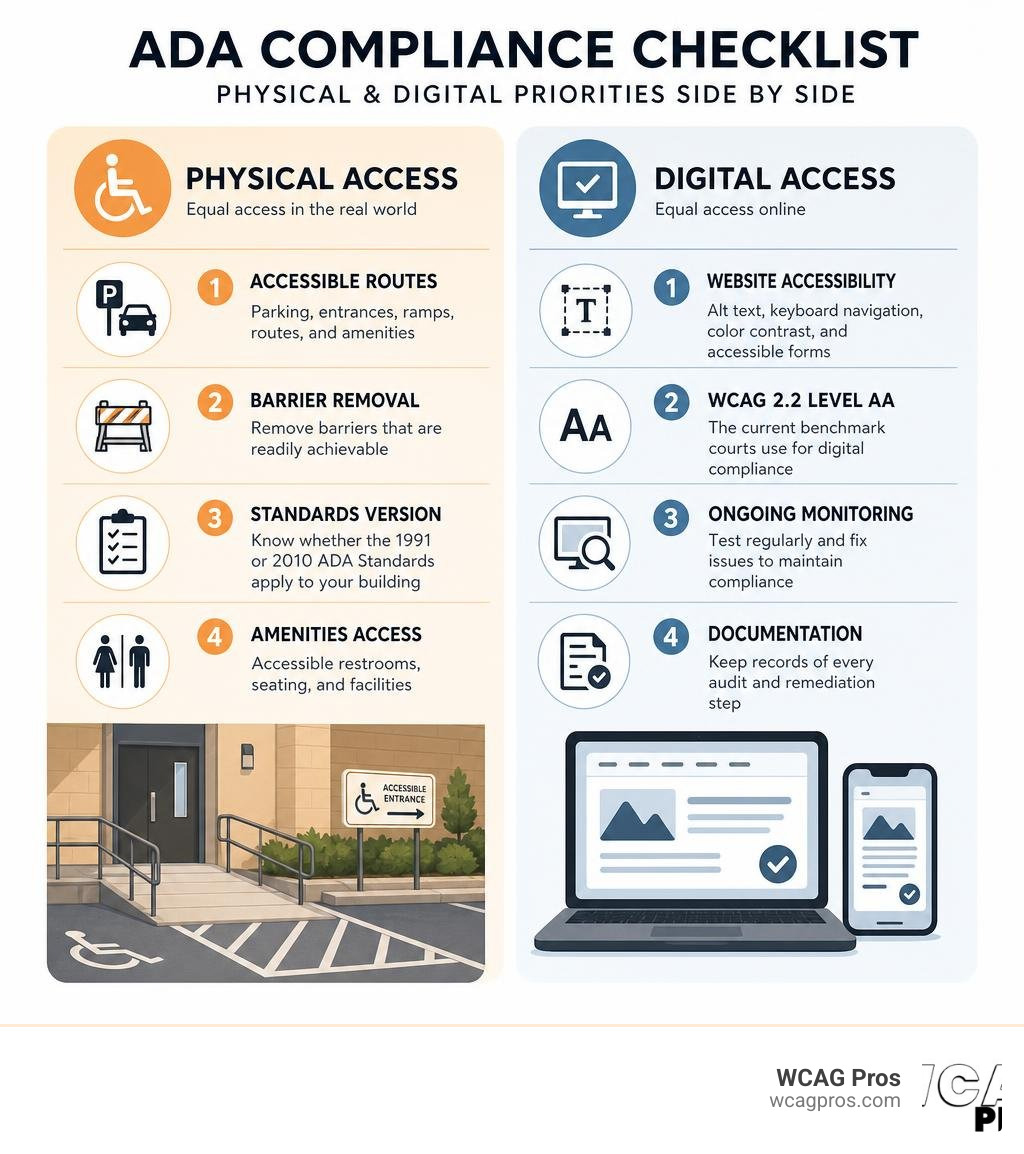
- Physical access , Parking, entrances, ramps, routes, restrooms, and amenities
- Barrier removal , Fix what is “readily achievable” based on your size and resources
- Standards version , Know whether the 1991 or 2010 ADA Standards apply to your building
- Website accessibility , Alt text, keyboard navigation, color contrast, and accessible forms
- WCAG 2.2 Level AA , The current benchmark courts use for digital compliance
- Ongoing monitoring , Compliance is a process, not a one-time fix
- Documentation , Keep records of every audit and remediation step
Most business owners think of the ADA as a building code. It is not. It is a civil rights law, and it applies to your physical space and your website equally.
Over 50,000 ADA lawsuits were filed in 2023 alone, a 50% jump from the year before. And right now in July 2026, a federal DOJ deadline is pushing state and local governments to make their websites fully accessible, while private business enforcement is accelerating at the same time.
The risks are real. The fixes are often simpler than you expect.
I am Matthew Post, co-founder of WCAG Pros and a programmer with over 20 years of experience auditing websites and facilities against ADA and WCAG standards. I have built this guide around the same ADA compliance checklist framework I use when evaluating real businesses, so you get practical steps you can act on today.
ADA compliance checklist terms made easy:
Understanding ADA Legal Foundations and Facility Requirements
To build a solid compliance strategy, we must first understand what the Americans with Disabilities Act actually requires. The ADA is a landmark civil rights law enacted to protect individuals with disabilities from discrimination. Because it is a civil rights law and not a local building code, it does not simply apply to new construction. It applies to existing facilities as well.
Many business owners believe their older buildings are grandfathered in and exempt from accessibility rules. This is a common and costly misconception. The law requires existing facilities to remove architectural barriers when doing so is achievable. If your building was built before the ADA was passed, you are still obligated to make updates to ensure equal access to your goods and services.
For a deeper look at your state-specific obligations, you can review the official resources on ADA Compliance – Existing Facilities or read our comprehensive guide to ADA business requirements to learn how these rules impact your daily operations.
The Core Differences Between Title II and Title III
The ADA is divided into several sections called titles. The two most important titles for physical and digital spaces are Title II and Title III.
Title II applies strictly to state and local governments. This includes public entities like school districts, public libraries, county health clinics, and public transit systems. Under Title II, these entities must ensure that all of their programs, services, and activities are accessible to people with disabilities.
Title III applies to public accommodations and commercial facilities. This covers private businesses that are open to the public, such as retail stores, restaurants, hotels, theaters, private schools, and doctors’ offices. While both titles aim to eliminate discrimination, their legal standards and compliance pathways differ significantly.
Readily Achievable Barrier Removal vs Program Accessibility
The legal standards for Title II and Title III entities handle existing physical barriers in two distinct ways.
For Title III entities, private businesses must engage in readily achievable barrier removal. The term readily achievable means easily accomplished and able to be carried out without much difficulty or expense. This is a flexible standard that depends on the financial resources of the business, the overall size of the operation, and the cost of the structural fix. If a small mom-and-pop shop cannot afford to install an elevator, they might find alternative ways to serve customers, such as bringing goods down to the first floor.
For Title II entities, state and local governments must meet the program accessibility standard. This means that when viewed in its entirety, a government program or service must be accessible. A city does not necessarily have to make every single historic building accessible if they can move the public meetings to an accessible building down the street. However, they must still ensure that no citizen is shut out of public services due to physical barriers.
The 1991 and 2010 Standards and the Safe Harbor Provision
The Department of Justice has released two major versions of the ADA Standards for Accessible Design. The original standards were released in 1991, and the updated standards were adopted in September 2010.
If your facility was built or altered before March 15, 2012, and it fully complied with the 1991 ADA Standards, you may benefit from a rule called the safe harbor provision. Under safe harbor, you are not required to retrofit existing physical elements to meet the stricter 2010 ADA Standards unless you plan to undertake alterations to those elements.
For example, if your existing restroom grab bars complied with the 1991 rules, you do not have to move them to match the 2010 rules. However, if you decide to remodel that restroom, safe harbor no longer applies to those elements, and you must bring the remodeled space up to the 2010 standards.
How to Conduct a Physical Survey Using the ADA Compliance Checklist
Before you start tearing down walls or pouring concrete, you need to know exactly where your facility stands. Conducting a thorough compliance survey is the best way to map out your physical space and identify barriers.
A physical survey involves walking through your property from the perspective of an individual with a disability. You will start at the very edge of your property, where a visitor first arrives, and follow the path they would take to enter your building, purchase your goods, and use your restrooms.
To help you navigate this process, we recommend utilizing the California Business ADA Compliance Checklist as a practical reference tool during your walkthrough.
Essential Tools and Preparation Steps for Your ADA Compliance Checklist Survey
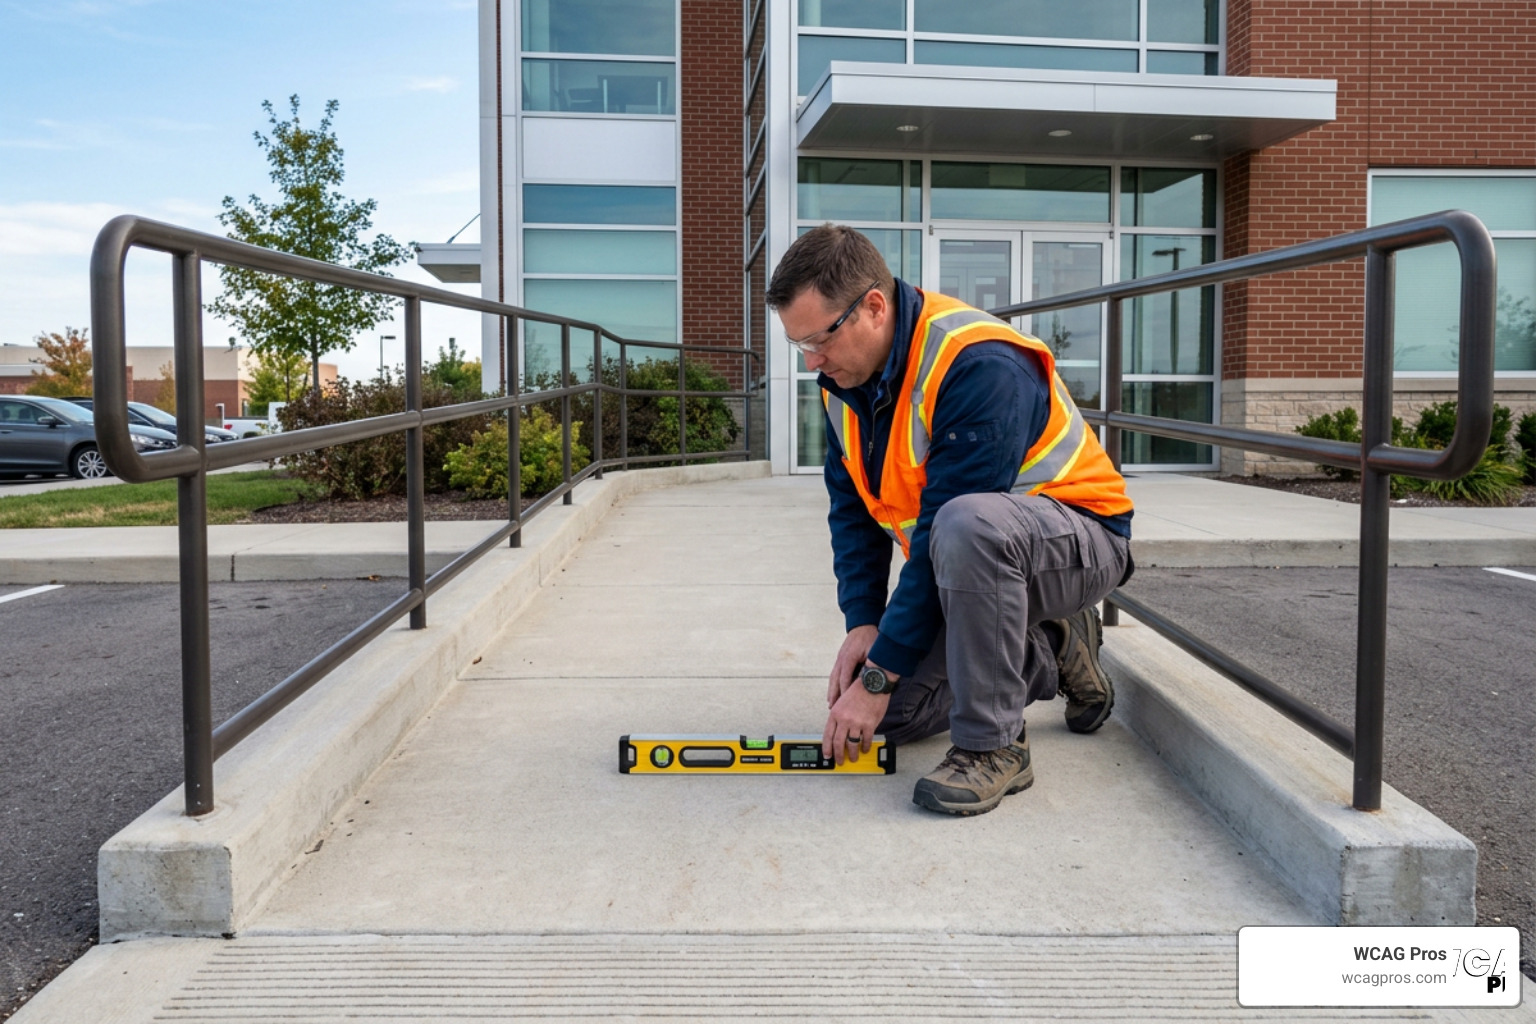
To conduct an accurate physical survey, you need the right tools. Do not try to eyeball your measurements. A fraction of an inch or a single degree of slope can be the difference between compliance and a costly violation.
Gather these essential tools before you begin:
- A steel tape measure – Use this to measure door widths, counter heights, and corridor clearances.
- A digital level – This is crucial for measuring the slope of ramps, parking spaces, and walkways.
- A copy of your floor plans – Having a sketch of your layout helps you take organized notes.
- A digital camera or smartphone – Photograph every element you measure, especially those that appear to be non-compliant.
- A notebook or clipboard – Keep detailed records of every measurement, location, and potential barrier.
Common Architectural Barriers and Practical Solutions
As you complete your walkthrough, you are highly likely to encounter several common architectural barriers. Fortunately, many of these barriers have straightforward, practical solutions that do not require major construction.
If you find stairs at your entrance, the solution is to install an accessible ramp or a platform lift. If your doorways are too narrow for a wheelchair, you can often install offset hinges, also known as swing-clear hinges, which swing the door completely out of the opening to provide a few extra inches of clearance. If your service counters are too high, you can designate an auxiliary lower counter or provide a folding shelf to accommodate customers who use wheelchairs.
The Four Priorities of the Physical Accessibility Checklist
The Department of Justice recommends organizing your barrier removal efforts into four distinct priorities. This helps businesses focus their resources on the most critical areas of access first.
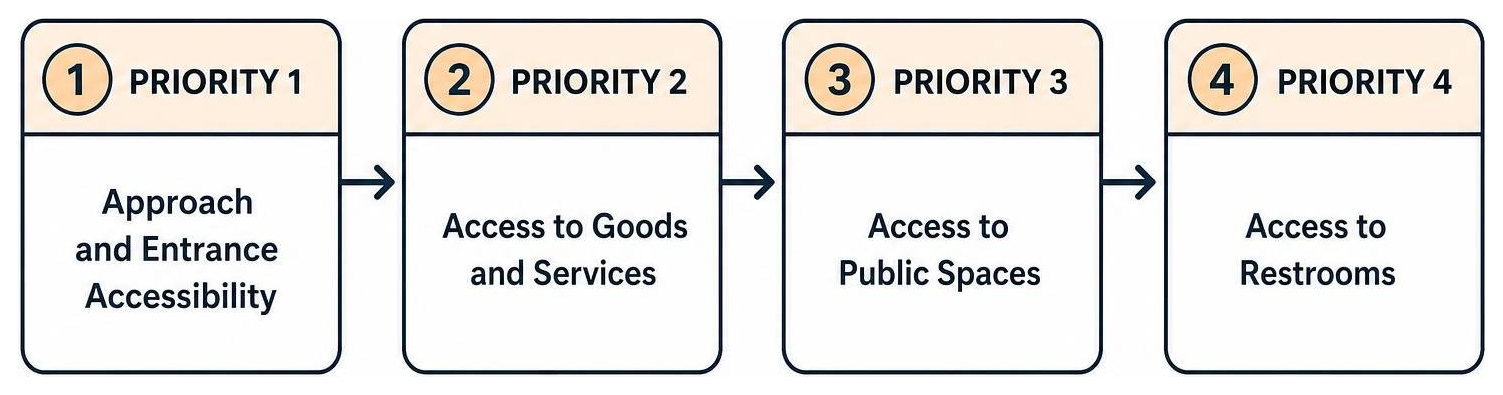
By tackling these priorities in order, you ensure that people with disabilities can at least get onto your property and through your front door before you focus on finer interior details.
Priority 1 for Approach and Entrance Accessibility
Priority 1 focuses on getting people safely onto your site and through your front door. If people cannot get into your building, they cannot access your goods and services at all.
Your survey for Priority 1 must evaluate:
- The accessible route – There must be at least one continuous, stable, firm, and slip-resistant path from public transportation, sidewalks, and parking spaces to your entrance.
- Accessible parking spaces – You must provide an adequate number of accessible spaces, including van-accessible spaces with at least 98 inches of vertical clearance.
- Curb ramps – Ramps must be present wherever an accessible route crosses a curb. Ramps must not have a running slope steeper than 1:12.
- Entrance doors – Doors must have at least 32 inches of clear opening width and must not require excessive force to open.
- Slopes – The running slope of an accessible route must not be steeper than 1:20, and the cross slope must not exceed 1:48.
Priority 2 for Access to Goods and Services
Once visitors are inside, Priority 2 ensures they can access the areas where you conduct business. Whether you run a retail shop, a bank, or a restaurant, customers must be able to navigate your interior spaces easily.
This priority requires you to check interior routes to ensure they are wide enough for a wheelchair to pass. Ramps and elevators must be available if your business occupies multiple levels. You must also ensure that directional signage is clear, and that service counters or checkout lanes are low enough to be used by everyone.
Priority 3 for Toilet Rooms and Restroom Fixtures
If your business provides restrooms for customers, those restrooms must be accessible. Restroom violations are among the most common sources of ADA lawsuits, so pay close attention to this section of your ADA compliance checklist.
An accessible restroom requires proper signage, including tactile braille signs mounted on the wall next to the latch side of the door. Inside, you must provide accessible toilet compartments with sturdy grab bars mounted on the side and rear walls. Sinks must have sufficient knee clearance underneath, and the hot water pipes must be insulated to prevent burns.
Priority 4 for Additional Access and Amenities
Priority 4 covers any remaining amenities and services that you offer to the public. This ensures that a visitor with a disability has the same complete experience as any other customer.
Under this priority, you will evaluate drinking fountains to ensure they offer both standing-height and wheelchair-height access. You must also check public telephones, fire alarm pull stations, and other localized amenities to ensure they are within the reach of a person using a wheelchair.
Expanding Your Accessibility Strategy to the Digital World
In our highly connected world, accessibility does not stop at your physical front door. Your website is often the very first point of contact a customer has with your business. If your website is unusable for someone who is blind or has motor limitations, you are shutting out a massive portion of your audience.
Digital accessibility is no longer optional. Federal courts consistently rule that websites are public accommodations under Title III of the ADA.
To help state and local governments navigate these rules, the DOJ maintains the Chapter 5 Addendum: Title II Checklist (Website Accessibility) . If you run a private business, you can refer to our guide on ADA compliance for small businesses in 2025 to protect your company from digital lawsuits.
Why Digital Accessibility is Crucial in July 2026
We are currently in July 2026, and the landscape of digital accessibility has shifted dramatically. The Department of Justice has established clear, binding deadlines for public entities under Title II, forcing state and local government websites to conform to WCAG 2.2 Level AA standards. Larger public entities must comply by April 2027, while smaller districts have until April 2028.
This regulatory push has triggered a massive wave of private litigation under Title III. Plaintiff attorneys are actively targeting businesses of all sizes with demand letters and lawsuits. Proactively addressing web accessibility is not just about avoiding legal risk. It is also a smart business decision that can increase your customer engagement by up to 20 percent.
For a complete overview of the process, take a look at our guide to website ADA compliance.
Key Steps for an Effective Website ADA Compliance Checklist
To make your website accessible, you must align your digital content with the Web Content Accessibility Guidelines, specifically WCAG 2.2 Level AA.
Here are the most critical steps to include in your digital checklist:
- Alternative text , Provide descriptive alt text for all meaningful images so screen readers can describe them to blind users.
- Keyboard navigation , Ensure that every link, button, form field, and menu can be reached and activated using only the Tab and Enter keys.
- Color contrast , Maintain a contrast ratio of at least 4.5:1 for standard text against its background.
- Accessible forms , Ensure every input field has a clear, visible label that is programmatically associated with the input.
- Skip navigation , Provide a skip to main content link at the very top of your pages to allow keyboard users to bypass repetitive navigation menus.
To begin auditing your site, you can download our ultimate WCAG checklist or read our website ADA compliance checklist for a breakdown of the top ten digital must-haves.
Frequently Asked Questions About ADA Compliance
To help summarize the key concepts of physical and digital accessibility, we have put together a quick comparison table:
| Requirement Category | Physical Facilities (ADA Title III) | Digital Websites (WCAG 2.2 AA) |
|---|---|---|
| Primary Standard | 2010 ADA Standards for Accessible Design | Web Content Accessibility Guidelines (WCAG 2.2) |
| Core Goal | Remove architectural barriers to entry and movement | Ensure perceivable, operable, and robust web content |
| Legal Test | Barrier removal must be readily achievable | Website must be accessible to assistive technologies |
| Common Fixes | Ramps, door wideners, grab bars, lower counters | Alt text, keyboard access, high contrast, form labels |
What is the difference between Title II and Title III under the ADA?
Title II applies to all public entities at the state and local government levels. This includes public schools, transit systems, and city halls. Title III applies to private businesses that operate as public accommodations, such as retail shops, restaurants, hotels, and private clinics. While Title II focuses on program accessibility across government services, Title III focuses on readily achievable barrier removal for private commercial spaces.
How does the safe harbor provision protect older facilities?
The safe harbor provision protects facilities built or altered before March 15, 2012, that complied with the original 1991 ADA Standards. If an element in your building meets the 1991 rules, you do not have to modify it to meet the 2010 rules unless you choose to alter or remodel that specific area.
What are the WCAG 2.2 requirements for website accessibility?
WCAG 2.2 is the latest set of international guidelines for digital accessibility. It is built around four core principles, which state that content must be perceivable, operable, understandable, and robust. To achieve compliance, websites must meet Level AA success criteria, which include proper keyboard navigation, high color contrast, clear form labels, and alternative text for images. You can find a detailed breakdown of these rules in our ADA website compliance 2025 accessibility checklist.
Conclusion
Achieving ADA compliance can feel like navigating a complex maze of physical measurements and digital code. However, breaking the process down into a structured ADA compliance checklist makes the journey entirely manageable. By addressing physical barriers in order of priority and aligning your digital presence with WCAG 2.2 standards, you protect your business from litigation while opening your doors to millions of underserved customers.
At WCAG Pros, we specialize in taking the stress out of accessibility. Operating out of Norco CA, our expert team provides comprehensive page-by-page audits of all 54 WCAG points. We do not just hand you a list of errors. We provide actual code fixes and offer free re-audits to help you earn your compliance badges.
Ready to secure your business and make your website accessible to everyone? Explore our WCAG remediation services today and let us handle the heavy lifting for you.
Read more website accessibility articles
Get Help With Your Website
We'll follow up with info about:
- The process
- Cost
- Timeline
We promise to respect your privacy, and never abuse the information you provide. We will not sell or rent your information to any third party.
By submitting this form, you consent to receive SMS messages and/or emails from SEM Dynamics LLC, dba WCAG Pros. To unsubscribe, follow the instructions provided in our communications. Msg & data rates may apply for SMS. Your information is secure and will not be sold to third parties.